Watercolors by Betty Oliver
  • Home
  • NEW! Posters
  • Ossabaw Island
  • Coastal Georgia
  • North Georgia
  • Giclee prints
  • Travel Sketchbooks
  • Cheng-Khee Chee Watercolor Workshop
  • Charles Reid Watercolor Workshop
  • Tin Squaw Studio
  • Art Jam Blog

Charles Reid Watercolor Workshop. Glynn Arts Association, St. Simons Island, GA March 20-22, 2013

Picture
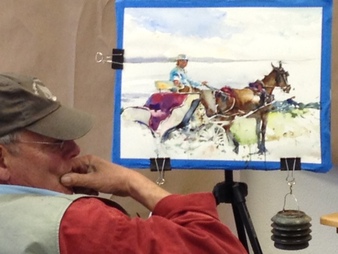
Charles Reid's finished painting of horse & carriage
After 4 years of trying to get into a Charles Reid workshop and being on the wait list for this one, I finally managed to get in.  And this workshop just happened to be on St. Simons Island, my home! Originally scheduled as a plein air workshop, unseasonably cool and windy weather kept us inside for 2 of the 3 days, but as a result we were able to spend one day studying watercolor portraits. On the other "inside" day we painted from photographs, and the day we were outside was spent painting the lighthouse. Finally getting to meet Charles Reid and study with him was quite a treat; putting into practice his instructions will be quite a challenge!

Our supply list:
Escoda Kolinsky Reserva travel brushes, #6, #8, & #10 from Artxpress.com
Charles Reid prepared palette of Holbein pigments from Artxpress.com
Image at left: Charles Reid contemplating finished painting of horse & carriage.

Picture
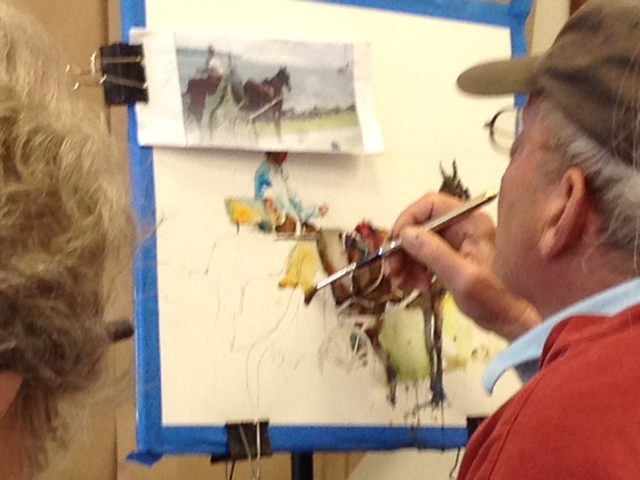
Mr. Reid painting horse & carriage
Picture
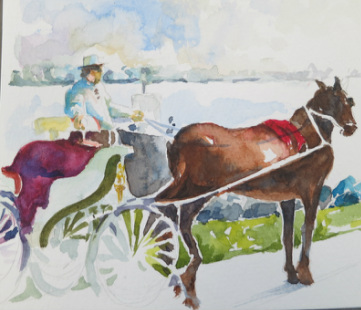
My finished painting of horse & carriage

The first day: Painting from photographs

March 20th: drizzling rain and wind; too cold to paint outside. We were each given a photo of the horse and carriage that provides tours of the village. Mr. Reid began his demonstration by sketching the scene as we sketched along with him.

Major points made in drawing demo:
  1. "No sketching! Do a single line drawing. Go steady; concentrate--[this is] almost contour drawing."
  2. "Make image as LARGE as possible--3/4 of the sheet."
  3. "You don't have to draw with great skill; you just have to draw with concentration."
  4. "Drawing is actually geometry. It's understanding angles and distances."
For this exercise I used Fabriano 140 lb. rough paper in a block; this is the paper recommended by Mr. Reid, because it doesn't have to be stretched. He doesn't recommend Arches paper; it has to be stretched to remove excess sizing.
After we finished drawing the image, we painted along with Mr. Reid.

Major points made while painting image:
  1. "Paints should ALWAYS BE DAMP."
  2. "Avoid sketchy brushwork; [use] quiet brushstrokes." (Hmmm...quiet?)
  3. When mixing greens, avoid fugitive Hooker's green. Use oxide of chromium & viridian.
  4. Mix a nice green with lemon yellow and cerulean.
  5. For lighter skin tones, use cadmium red, cadmium yellow, and cerulean.
  6. Remember that burnt umber and burnt sienna are "reds"
  7. Raw umber and raw sienna are "greens"
  8. Mr. Reid begins in a small area and FINISHES that area before he moves on to the next. (I've always been taught to paint light washes over entire area, saving details till last. Mr. Reid does the opposite, and it certainly works well for him!)


Picture
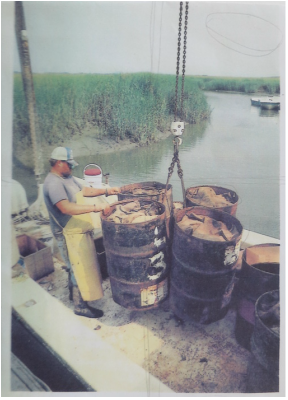
Photo: Unloading barrels of crabs
Additional reflections from Day 1:

Mr. Reid suggested that we draw our subjects upside down so that we concentrate on drawing shapes rather than a particular subject. This is the same technique that Betty Edwards uses in her book Drawing on the right side of the brain.

I rarely saw Mr. Reid wet the paper before painting. He very rarely mixed pigments on his palette; he applied a color to the dray paper and then added another color immediately, allowing the colors to mix on paper. He rarely painted over an area, and if he did, he never painted over it more than once. Consequently his colors were always pure--never muddy. I really need to pay attention to this.


Picture
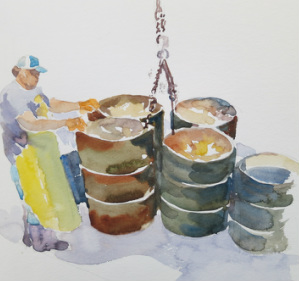
My unfinished painting of crab barrels
Picture
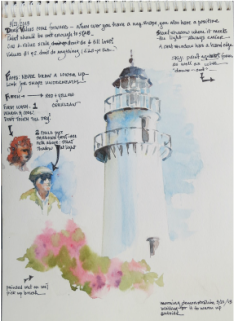
A page from my sketchbook: sketching along with Mr. Reid during demonstration
Picture
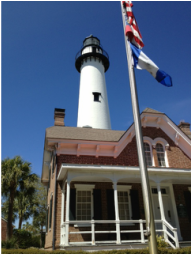
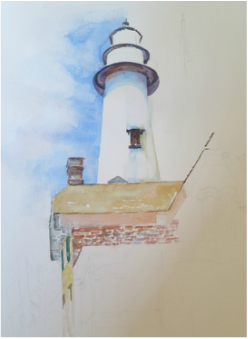
Photo of lighthouse and keeper's cottage

Day 2: Plein air painting

Demonstration in the morning before going outside: painting a lighthouse.  Windy but beautiful and sunny. We walked to the lighthouse to paint.

Major points made in demonstration:
  1. Think SHAPES. Whenever you have a negative shape, you also have a positive one. And vice versa.
  2. Shadows: Start painting  your shadow where it meets the light; always easier. (Interesting--I guess I've been doing this backwards....)
  3. A cast shadow always has a hard edge.
  4. Sky: when painting the sky, paint AGAINST the form as well as with it; think "Down; then out." Stroke down, and then, without lifting the brush, pull the stroke out.

Reflections on painting outside:

  1. This looked so easy when Mr. Reid painted it....
  2. Painting--and finishing--one area at a time is very difficult for me, as well as so different from other techniques I've been taught.
  3. Painting outside requires quick thinking
  4. My plein air setup is more complicated than it should be; it takes me too long to get my easel up, and I need a place to put my palette. Will look into Mr. Reid's setup--photographer's tripod, etc. I think I might paint more outside if it weren't so complicated to get everything ready to go and then to get set up. (Excuses, excuses....)


Picture
Bad start: serious problems with the gazebo in foreground, etc. Nevered finished....
Picture
Second try--using the view in photo at left. Unfinished, obviously....

Picture
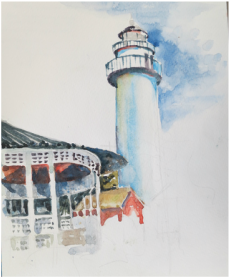
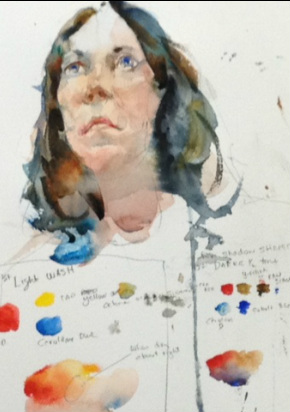
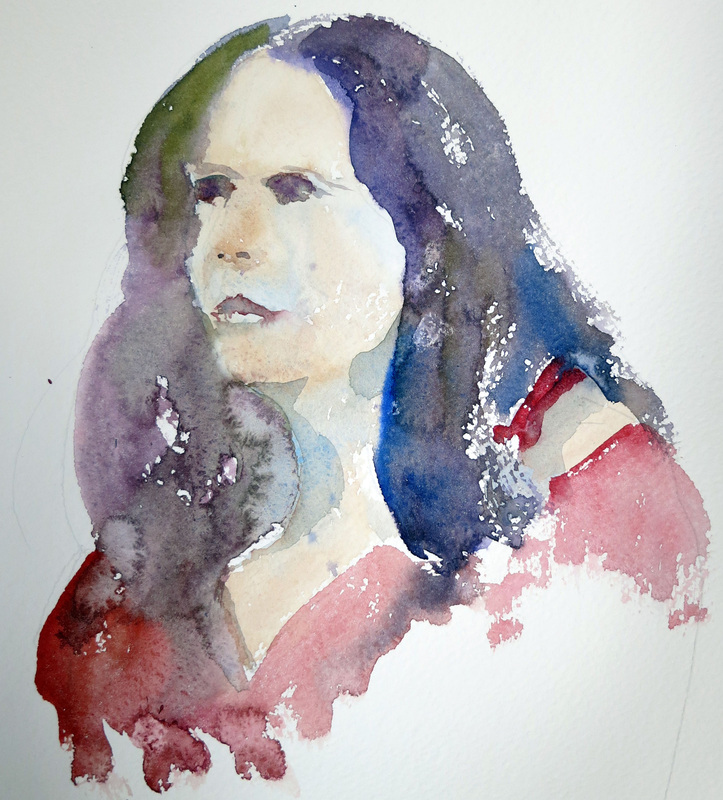
Mr. Reid's demonstration: 1st view and 1st technique
Picture
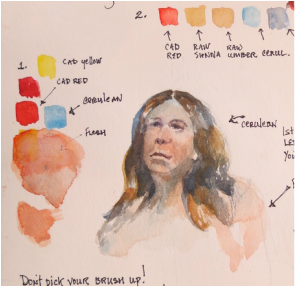
Mr. Reid's demonstration of technique #2, applying shadows before adding skin tones.

Day 3: Painting portraits

Major points: 1st technique:
  1. First technique: lay down wash in flesh-tone colors (warm); let dry before adding shadows (cool)
  2. Mix lighter flesh tones by mixing red + yellow + cerulean
  3. Never draw a lower lip; look for the shape underneath!
  4. Before drawing, determine where model is looking.
  5. "Don't pick up your brush; keep your brush on the paper!"


Major points: 2nd technique
  1. This technique is quicker than technique #1
  2. Put shadows (cools) in first.
  3. Add warms immediately after.


Reflections on portrait painting:
  1. I don't think this is "my thing." Certainly doesn't appear to be my strength at this point.
  2. Great to know how to mix flesh tones.
  3. I had never thought of burnt umber and burnt sienna as "reds" (warm) or raw unber and raw sienna as "greens" (cool)....
  4. There's a lyrical quality to Mr. Reid's portrait paintings; I wish I could bring that quality to my work.


Picture
My attempt while painting along during demonstration: seriously overworked! It's funny how obvious mistakes are when you look at a painting several days later--well, not so funny after all.
Picture
My attempt at a portrait during the afternoon session...unfinished, as usual...or perhaps just abandoned altogether.
Picture

Mr. Reid's plein air easel.

Mr. Reid uses a photographer's tripod  ("Manfretto tripod #7321 YB") and adapts his drawing boards to the tripod by securing a quick-release "hot shoe" attachment to the backs. In the photo at left, you can see that the easel can be tilted to nearly any angle. It also has a "quick release" head and a "quick release plate" (~$15) which he has glued to the back of his "gator board" drawing board. Very clever!!! This is probably a much lighter setup than the artist's easel I presently use.
Picture
Powered by Create your own unique website with customizable templates.